|
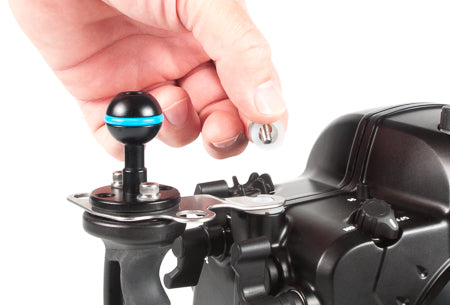
These pictures show how to mount the M10 Strobe Mounting Ball on the right side of the camera housing. You may mount it on the left if you prefer.
|
|
 Use a metric hex wrench to remove the socket head screw from the housing.
|
 Remove the screw, stainless steel washer, and nylon washer. Save the hardware; you will reinstall this nylon washer later.
|
 Now temporarily remove the mounting ball for handles. After removing the mounting ball, look at the orientation of the stainless steel plate so you can put it back the same way later.
|
 Remove the handle mounting ball, the plastic insulator (if present), the stainless steel plate, and the hardware; carefully set these parts aside so it will be easy to reinstall them later.
|
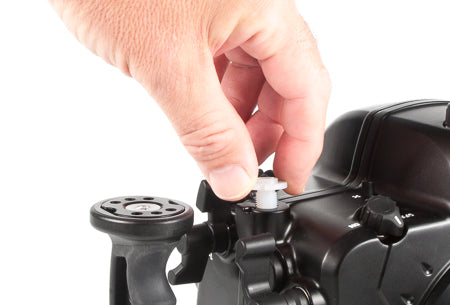 Unscrew the nylon insert.
|
 Remove the nylon insert from the housing. This part will not be reinstalled.
|
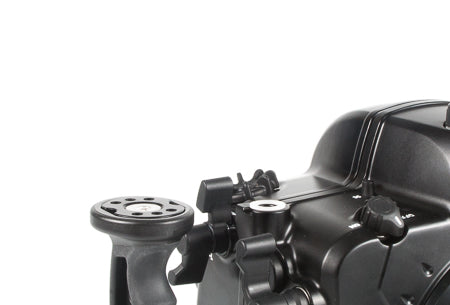 Place the original nylonwasher over the hole.
|
 Place the stainless steel handle bracket back in place over the nylon washer. It should be installed with its original orientation.
|
 Insert the M10 mounting ball into the hole and, using your fingers only, screw it in a few turns; do not tighten yet.
|
 Reinstall the 'mounting ball for handles'. If your system included a black plastic insulator, be sure to re-install it now.
|
 Place the ball on top and then insert the stainless steel bolts, thread the bolts in a few turns, do not tighten yet.
|
 Now is your chance to make sure everything is lined up correctly. If it is, tighten the screws holding the ball on the handle.
|
 Screw in the M10 mounting ball almost all the way in. Do not use a wrench at this time! You can screw it in all the way with your fingers, then unscrew the ball one or one-and-a-half turns. If your M10 Mounting Ball has a hole in it, you probably want the hole going 'across' the housing (you will not be able to see the hole if you are looking directly at the front of the housing.)
The objective is to ensure that the M10 Mounting Ball is not tight at this step. If you allow the M10 Mounting Ball to become tight at this point in the installation, it will be impossible to properly tighten the locknut (next step) and your lights will always get loose very quickly! |
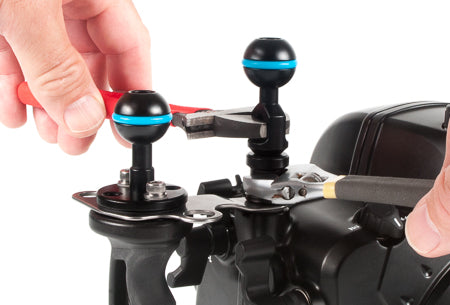 Now tighten the locknut without allowing the M10 Mounting Ball to turn. In this picture, we are tightening the locknut with the wrench in the right hand (black handle). The other wrench (red handle) is holding the mounting ball to prevent it from turning. The goal is to tighten the locknut (black wrench) securely without allowing the M10 Mounting Ball to screw any further into the housing.
Let the locknut do its job! The locknut will hold the M10 Mounting Ball securely to the housing and prevent the mounting ball from rotating when adjusting your strobes or lights. |
 Now smile. You are done. |
|